2: Apply the PSO to Users and Global Security Groups
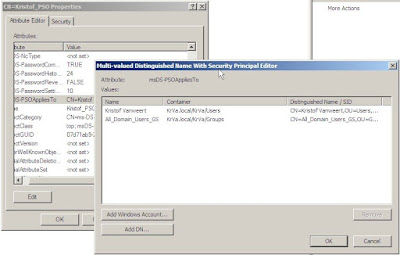
Now, in my example, I’ve added the PSO to a security group “All_domain_Users_GS”. However, I can add multiple users or groups to this PSO with a simple modify of the existing PSO.
Create a new ldf file and copy this text:
dn: CN=Kristof_PSO,CN=Password Settings Container,CN=System,DC=KrVa,DC=local
changetype: modify
add: msDS-PSOAppliesTo
msDS-PSOAppliesTo:CN=Kristof Vanweert,OU=Users,DC=KrVa,DC=Local
-
(Don't forget the dash "-" on the last line of the script, or it won't work!)
Then run your script again with the same command.
If all is OK, you’ll wind up with something like this:

Step 3: Managing the PSO
Now that the PSO is created, we can manage it from within the Users and Computers console.
Make sure you have the “Advanced features” enabled and browse to System -> Password Settings Container. Double click on your PSO and select the tab Attribute Editor. In this screen, you can edit all values as desired.

In this print screen you can see that the PSO precedence value is 10. If a user has multiple PSO assigned, the lowest value PSO will “win”.
Step 4: Managing Users
Now, that our PSO is completely in place, luckily it is pretty easy to figure out which PSO’s are applied on which user account.
To do so, open the Users and Computers console, enable the “Advanced Features”, locate your user account and open the “Properties”. Go to the “Attribute Editor” tab and adjust the filters to show Constructed Read-Only Attributes after which you can locate the msDS-ResultantPSO attribute.

There, nothing more to it. Luckily they didn’t make it more difficult than just creating a GPO and linking it to an OU …


No comments:
Post a Comment